Class APOL
 

Homepage > Videos gallery > Case studies > Inlay Cores

CLASS A

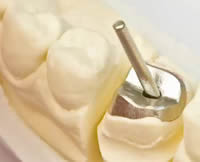
Once the temporary bridge has been removed, all traces of cement are cleaned from the preparations with an ultrasound scaler. The teeth were prepared at the last visit. We will therefore move straight on to the taking of an impression to make 3 inlay cores which will serve as abutments for the future bridge.

  • During the cleaning stage, slight bleeding may occur at the gingival margins. Of course, even very small amounts of blood could compromise the quality of the impression, whatever material is used. A product based on ferric sulfate should be used for haemostasis.
    The product is applied by rubbing lightly over the areas to be treated. It is essential to wash it off carefully after about thirty seconds, to remove any trace of gel.
    The impression will be taken with the corresponding posts for the spaces prepared earlier.
  • The choice of post is of critical importance.
    It is essential that the part of the post which emerges from the preparation should be long enough (i.e. 4–5 mm) to ensure that it is stable in the impression material. It is therefore essential to use a system which offers a large choice of posts of different lengths for the same calibre. Once the posts have been placed in the prepared root, the impression tray can be tried. The impression tray used to take impressions with Apol Classe should be a rigid, unperforated rim lock tray. After the material has been mixed it is loaded into the syringe and the impression tray. Material is injected by syringe in the conventional way, taking care to fill the preparation starter hole all around the posts. The loaded impression tray is then seated on the arch and kept in place until the material has set completely. Setting time in the mouth is about 45 seconds after the material has begun to gel.
  • The critical point for a successful impression is removal of the impression from the mouth.
    To make it easier to withdraw the impression in a straight line, the vacuum has to be broken by directing compressed air between the lip and the material. The impression tray can then be lifted off easily along the axis of the preparation.
    It can happen that a post becomes stuck in its space and does not come away with the impression. This is a special post that can be reseated in the impression without difficulty.
    After the model has been cast and the inlay cores made in the laboratory, they are tried in the mouth. As they fit perfectly, they can be cemented in the usual way.
  • SPLIT POST AND CORE RESTORATION

    Taking an impression for a split post and core restoration does not pose any particular problems. After the root has been prepared, the posts are tried, leaving a sufficient length emerging from the cavity for the post heads. In this case the impression is going to be taken with a dual arch tray.
    You can see that in occlusion the distal post makes occlusal contact with the opposing tooth. So a slightly shorter post is needed.
    The impression tray is tried and the patient is asked to bite their teeth together. It is important to check that all teeth are in occlusion.
  • The material is injected using a syringe, filling the cavity carefully all around the posts. The full impression tray is first placed on the half-arch containing the preparation, and the patient is asked to bite their teeth together in the same position as when the impression tray was tried. After the material has set the patient is asked to open their mouth wide in a straight line, and the impression is removed gently, assisted by compressed air directed under it.
    For the very rare cases when posts diverge too much, Apol Classe should not be used.
    After fabrication in the laboratory, the split post and core restoration is tried in the mouth. It can then be cemented in the usual way.

Voir la video

INLAY CORES


Apol, Dental Product Manufacturer, 597 rue René Cassin - 39 300 Champagnole - France. With kind participation of "laboratoire Actuel Dental" from Evreux (F)